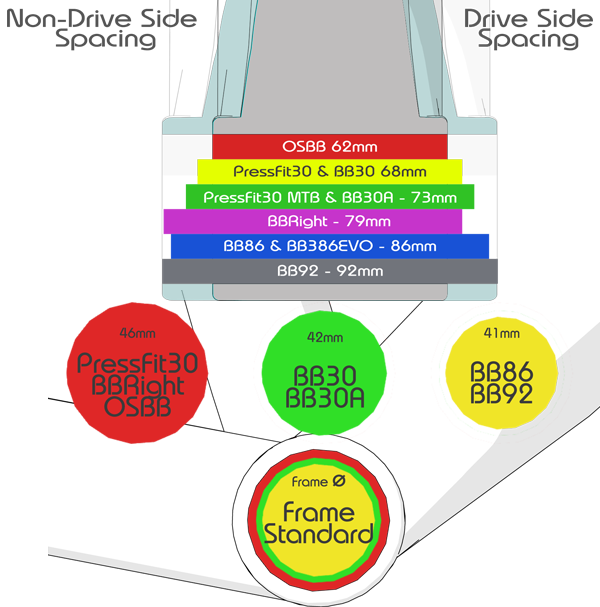
Bottom Bracket Selection Guide


When you're preparing to install a bottom bracket and a crank set you need to take a breath, a step back, and consider every aspect of what you're about to undertake to ensure you're going to get the results you're expecting. In this brief video series, we show you a step-by-step installation from start to finish. In this video we show a start-to-finish press-fitting operation of a BBInfinite One-Piece bottom bracket module.
Alright, the first step in pressing the bottom bracket is - it's all of our bottom brackets go in from the non-drive side and press over toward the drive side and uh let's go ahead and get this thing started nice and square just like that look at it from every angle to make sure that it's going in nice and square and then you can start pressing it's imperative that you use the proper die system to go with the bottom bracket whenever you're doing an install like this whatever you're driving with it can only touch the outer race of the bearing you should never use anything that presses on the inner race of the bearing it will destroy the bearing whereas the outer race is just a steel ring that's pressed into the housing it's exactly what you want to drive against driving a bottom bracket in should be a pretty uneventful process now it can get a little bit out of alignment sometimes like this so you just want to square it up and then keep an eye on it the whole time now we don't film this whole thing because watching a guy drive a bottom bracket in can be very tedious but what we want to do is we want to stop you're going to look at the instructions of course we're going to stop when the bottom bracket is not quite all the way in because we want to take the press apart and do what's called a mid-drive inspection to make sure everything's looking good coming in through this side so we just want to take a look all the way around to make sure that nothing's happening like it's not trying to pick up some like some carbon and curl it up in there or something like that and it's going in nice and straight which it is so we're going to go ahead and put retaining compound on this and continue and I like to use a gloved finger you can use an applicator like a i guess you could use a q-tip or something but I just like to use my finger and go ahead and get a thin coat of the retaining compound in there all right at this point we just need to drive it all the way in we're going to hear some creaks and pops and stuff like that as the retaining compound begins to light off heard me say it before say it again it's an anaerobic compound so when we start excluding oxygen it wants to pop like this like that that's normal that's not the carbon fiber popping that is the anaerobic ceiling popping excuse me that's the anaerobic compound popping as it's lighting off and then I'm putting pressure on it's breaking loose and moving that's that popping sound it's not carbon our next video we will install the crank
Comments will be approved before showing up.
