


Bottom Bracket Selection Guide

The following bottom bracket guide applies ONLY to installing the 2016-and up Super Six Evo HI-Mod and ALL 2017 and up Evo's.
Cannondale's new PF30A standard, released in 2016, as it turns out, is nothing new. Mostly. Kinda.
The PF30A takes the new SuperSix Evo bb shell from 68mm wide to 73mm, but just because it's the same width as a Scalpel bb shell doesn't mean it's just a mountain bike bb grafted onto a road frame. Not at all. That's because Cannondale borrowed a page out of Cervélo's playbook, but instead of coming up with BBRight, they stopped short at BB-Most-of-the-way-to the Right. Here's a visual (fig1).
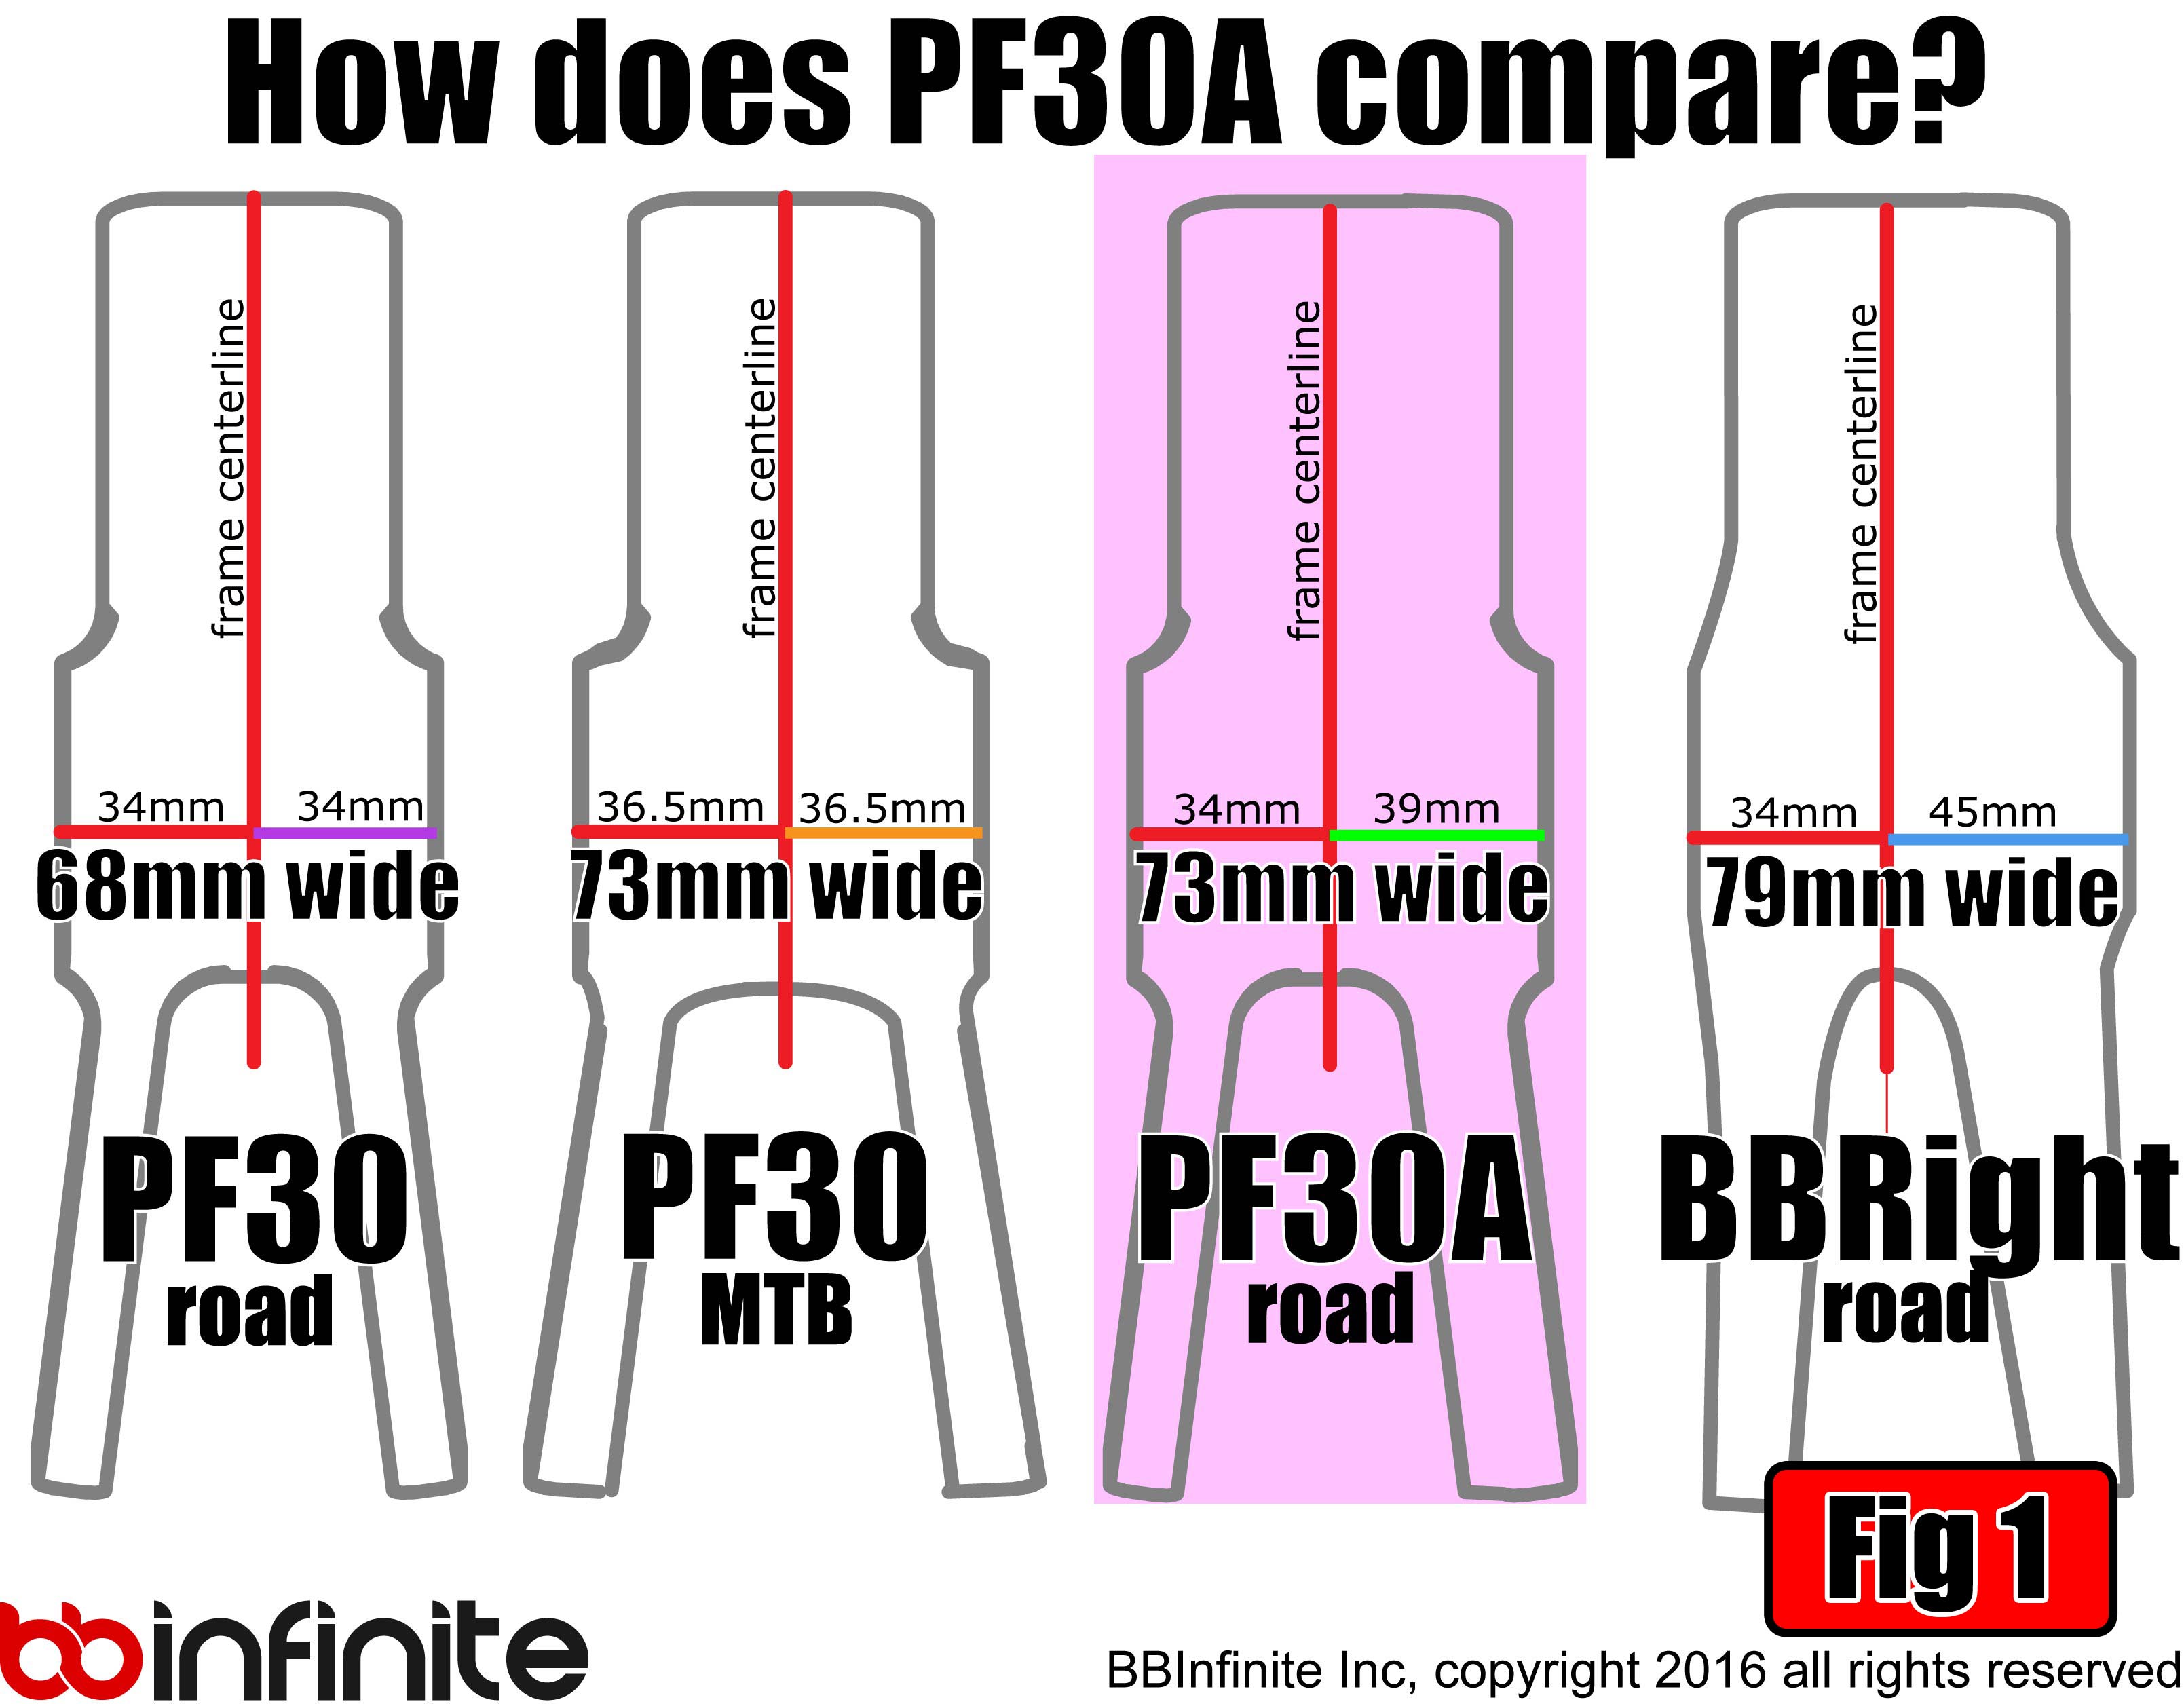
As you can see, PressFit30A has been achieved by extending the non-drive side of the bb shell out 5mm, instead of Cervélo's full monty approach, and just like BBRight, the drive side spacing was left alone. All this means for your install is that a BBInfinite PF30 BB MTB (73mm wide) module will work in your 2016-on PressFit30A Cannondale Evo frame AS LONG AS, and ONLY IF, you're using a 30mm spindle crankset such as the stock SiSL2 or any 30mm spindle crankset*, such as a Quarq 30mm spindle powermeter. If you're using any other crank, e.g., Shimano or GXP, you will need to use the module specific to those cranks.
And now to install the PF30A:
First, if you've got a frame with a bb installed, take out the crank and knock that puppy out.

I always use the Park Tools BBT-30.3 to do this because it takes the stupid right out of the process except for the fact that Park neglected to incorporate a stop between the driver grip and the backside of the blue plastic "locator" plug, which means you can pinch the crap out of yourself when the pressfit cup you're driving out suddenly yields; but I digress.
Once it's out you'll see that a derailleur cable is intruding into the space your BBInfinite module is soon to occupy (fig2). Not a problem. You can handle this easily.

I simply disconnected the rear derailleur cable, pulled the cable-end crimp off, and slipped a four inch (100mm) length of liner in over the cable (Fig3).

I used another length of the same liner as a pusher to properly position the smaller bit, then took the pusher-piece out. Leave the cable loose at the derailleur. You'll need a bit of slack in a minute.
Hint: if you need a liner, just take a piece of derailleur cable housing and strip the sheathing off with a razor blade to expose the parallel strands of steel. Peel the steel strands away and what you're left with is a nice piece of Teflon liner. Perfecto.
Installing the liner is necessary because the cable will contact the outside of the BBInfinite module when everything is up and working. Without a liner it would still all work just fine, but over time the sawing action of each shift could cut into the alloy of the module housing. It'd never cut through it, but it could possibly saw in deep enough to "catch" or bind the cable and cause shifting problems years down the road; so let's avoid it right now.
Now, I can tell that some of you are thinking this is the same type of no-no as crossing cables in the frame, and that shifting problems will certainly arise. Let me assure you that it's not at all like crossing cables. Crossing cables will definitely make shifting go haywire because the cables act like springs and deflect at different rates continuously, effectively changing cable length, bringing about ghost shifting and other problems. Running a cable over a smooth, rock-solid object with a progressive radius is the same thing as running housing inside a frame. No problem there. Just about every new bike does it.
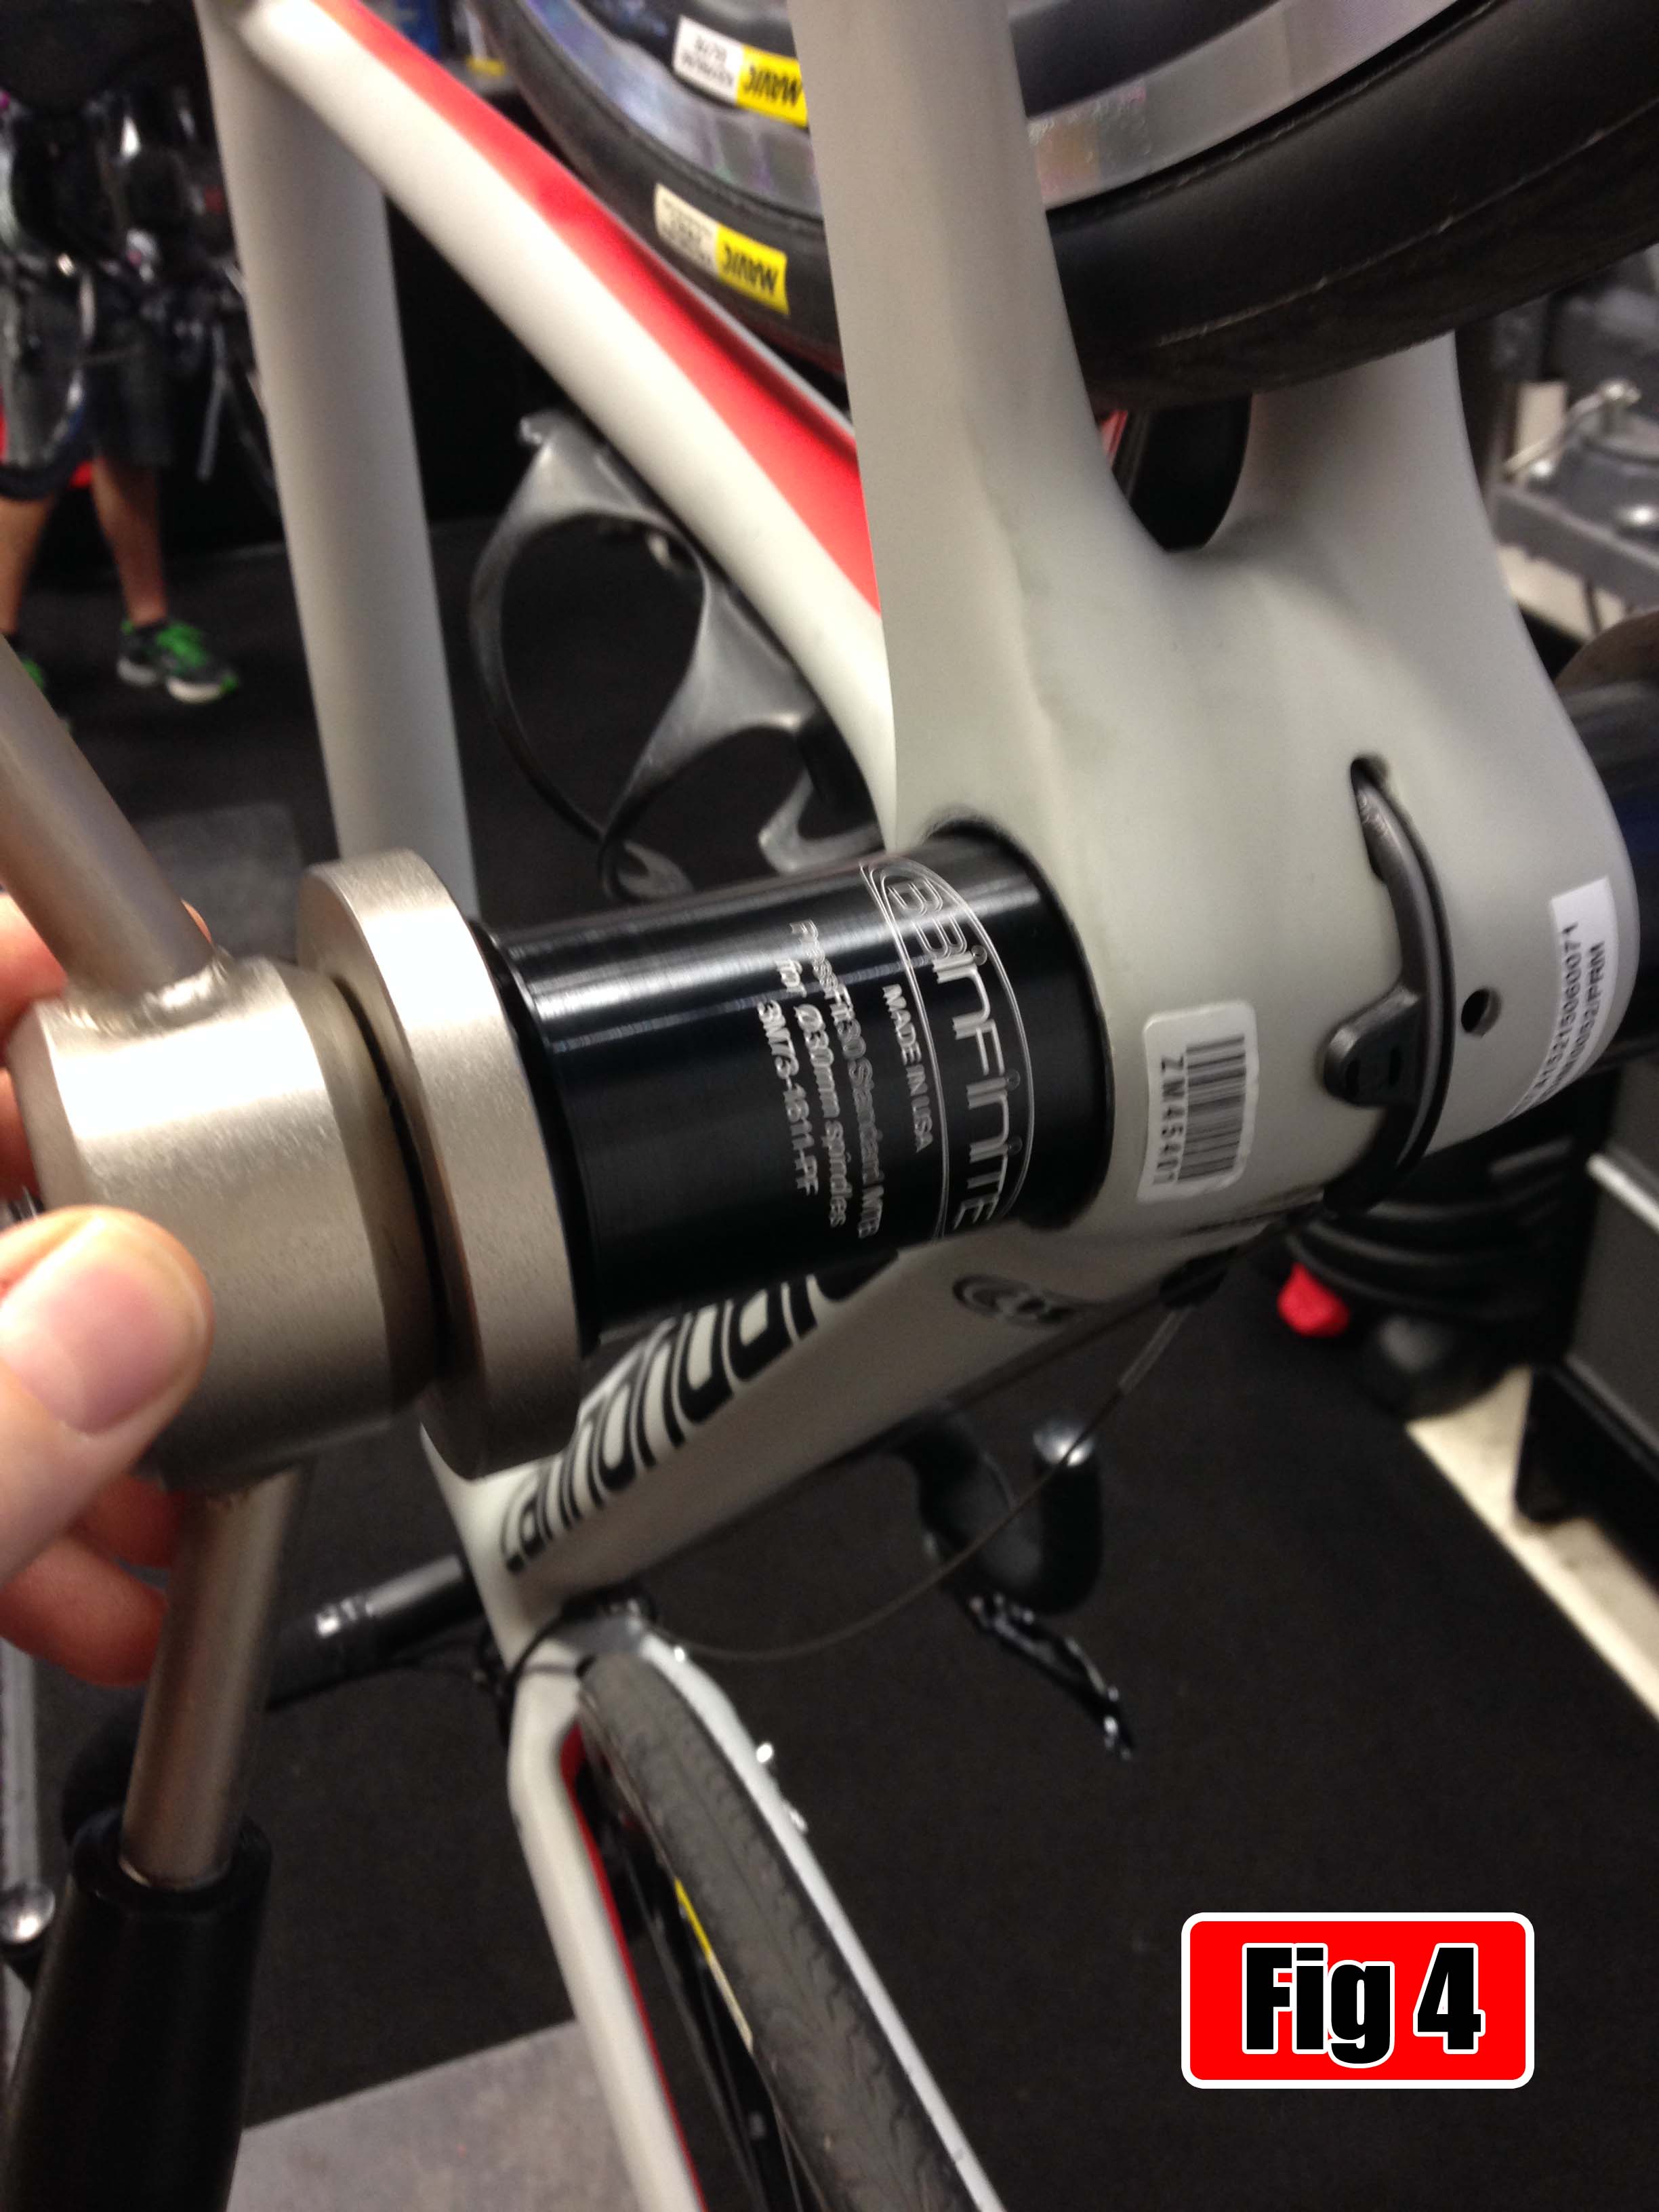
Continue to follow the PF30A installation instructions (Fig 4).
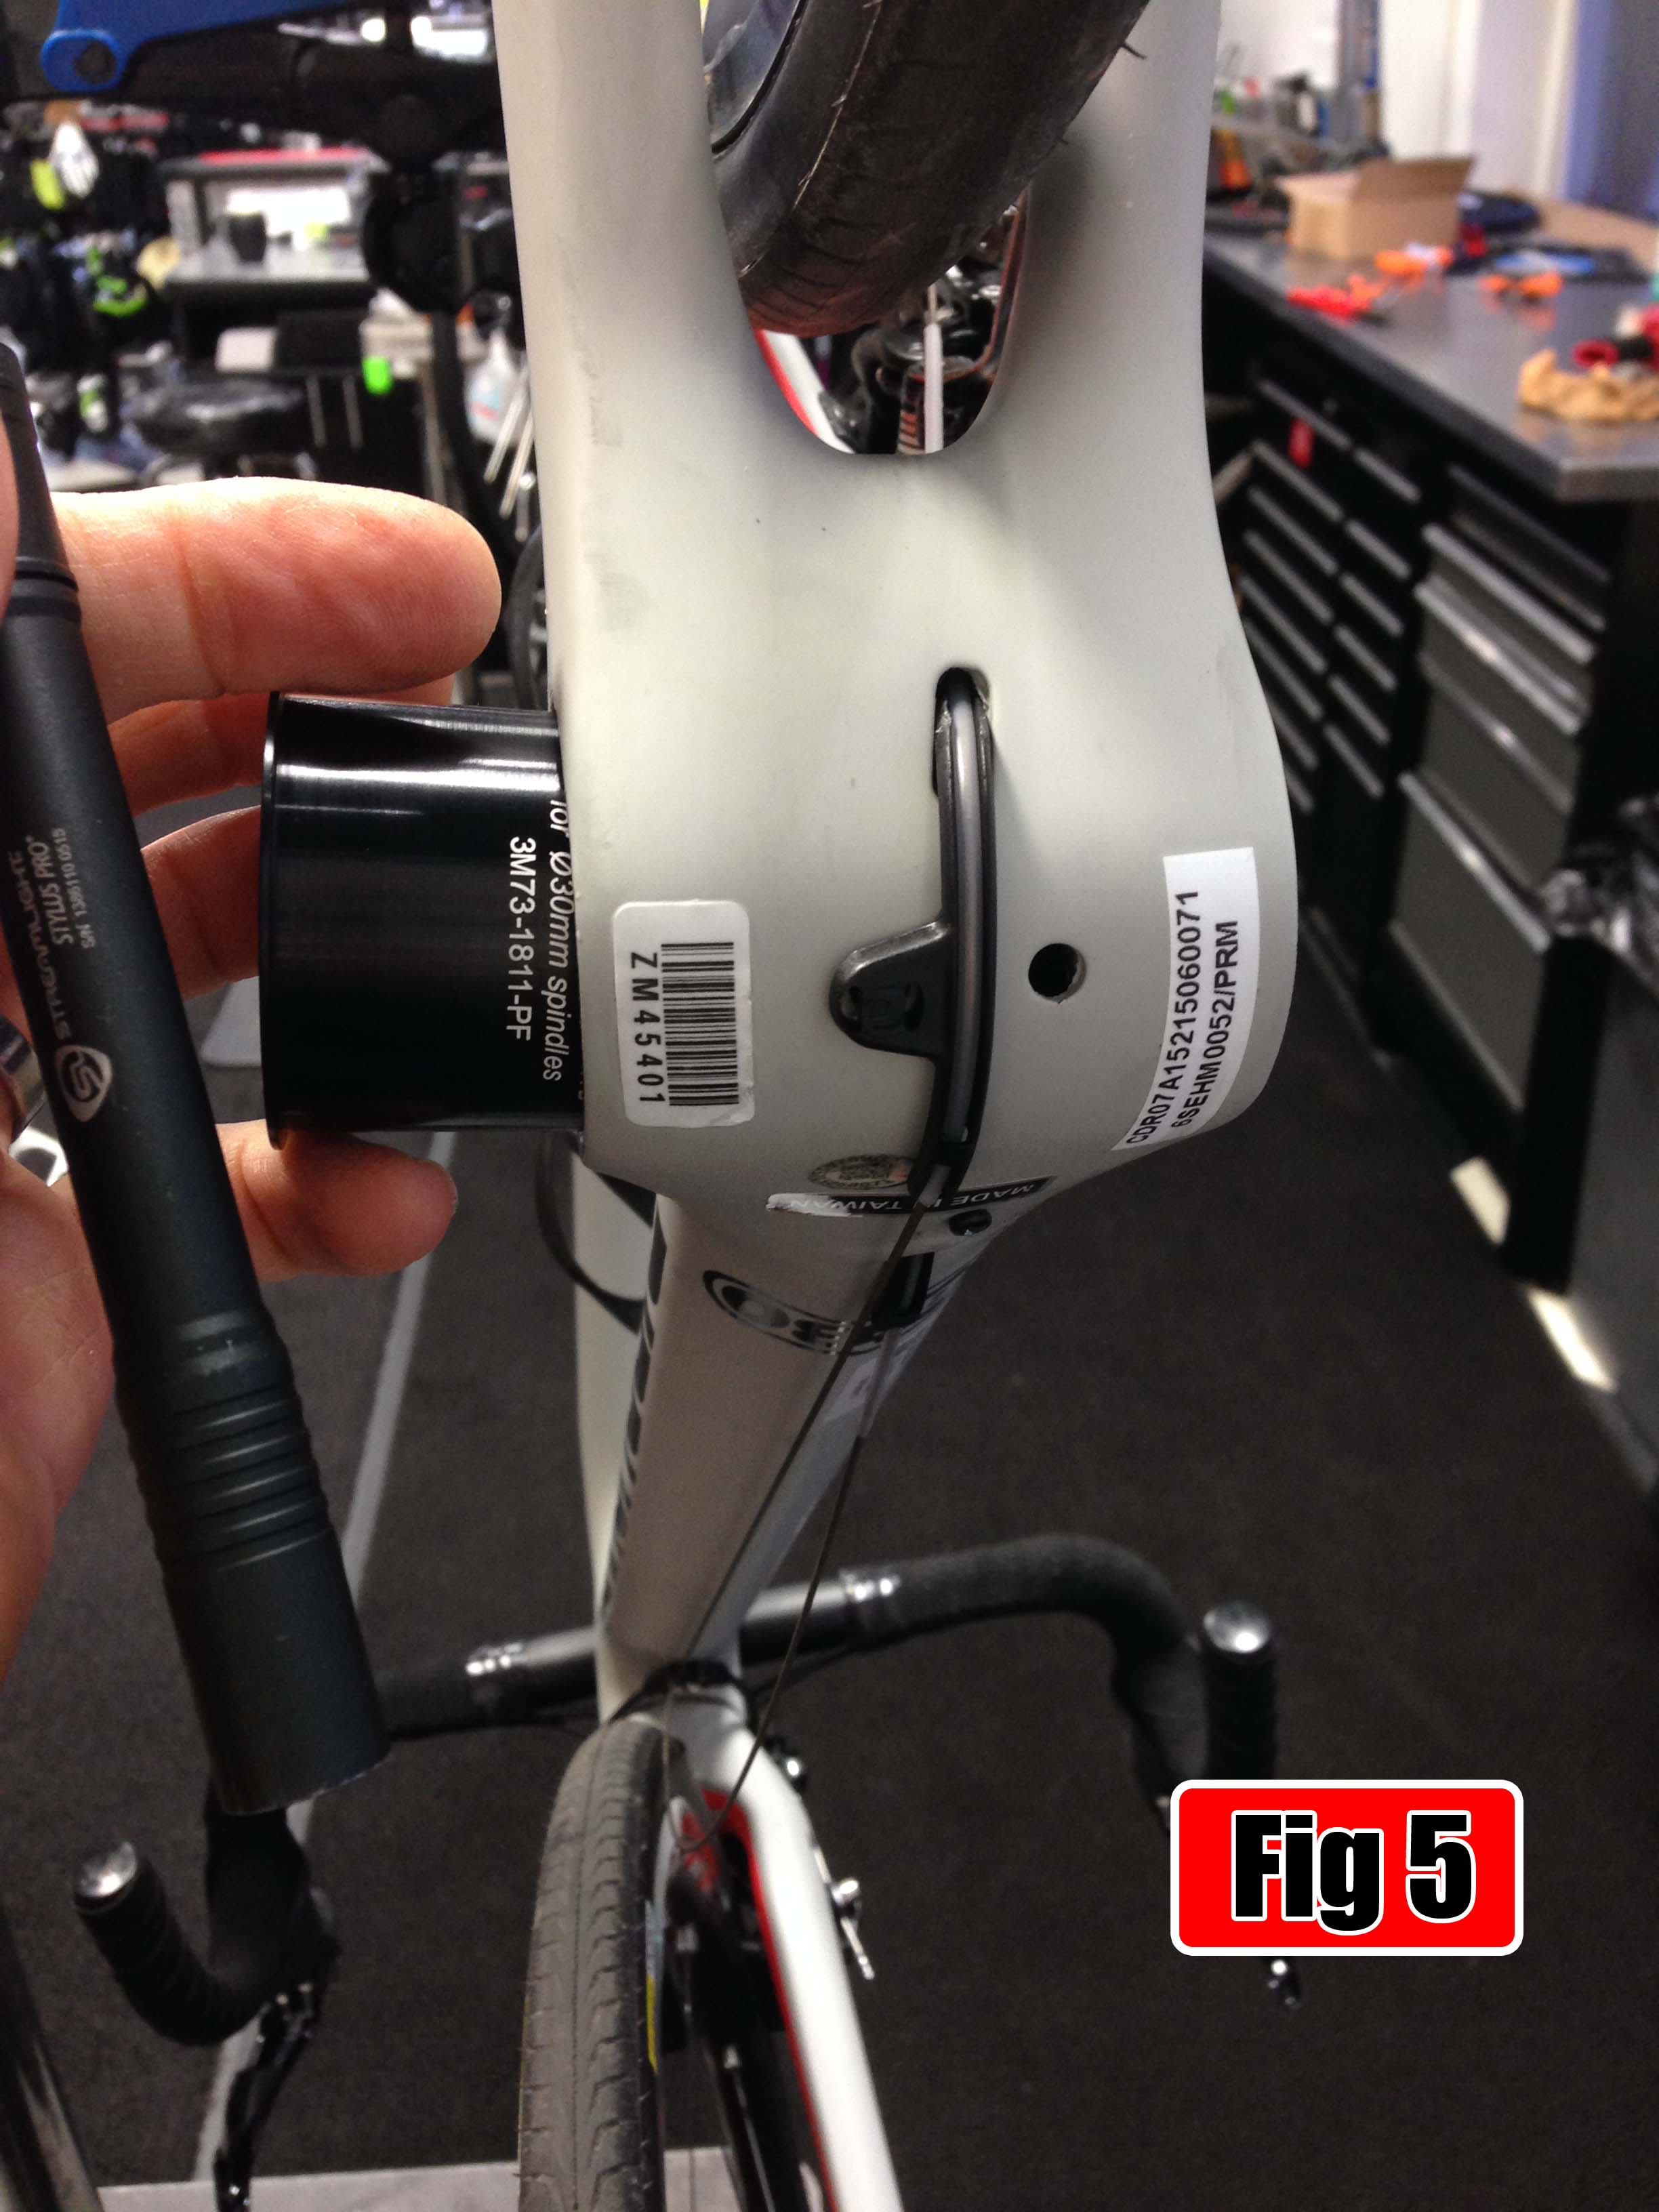
Take care to press the module in only until it "releases" in the center of the frame. You'll know it when it happens. The module has cleared the first contact zone and is now free in the frame (Fig 5).
Now remove the press and inspect from the drive side. (Fig 6).

Move the cable up and over the module (Fig 7) as you slide the module in.

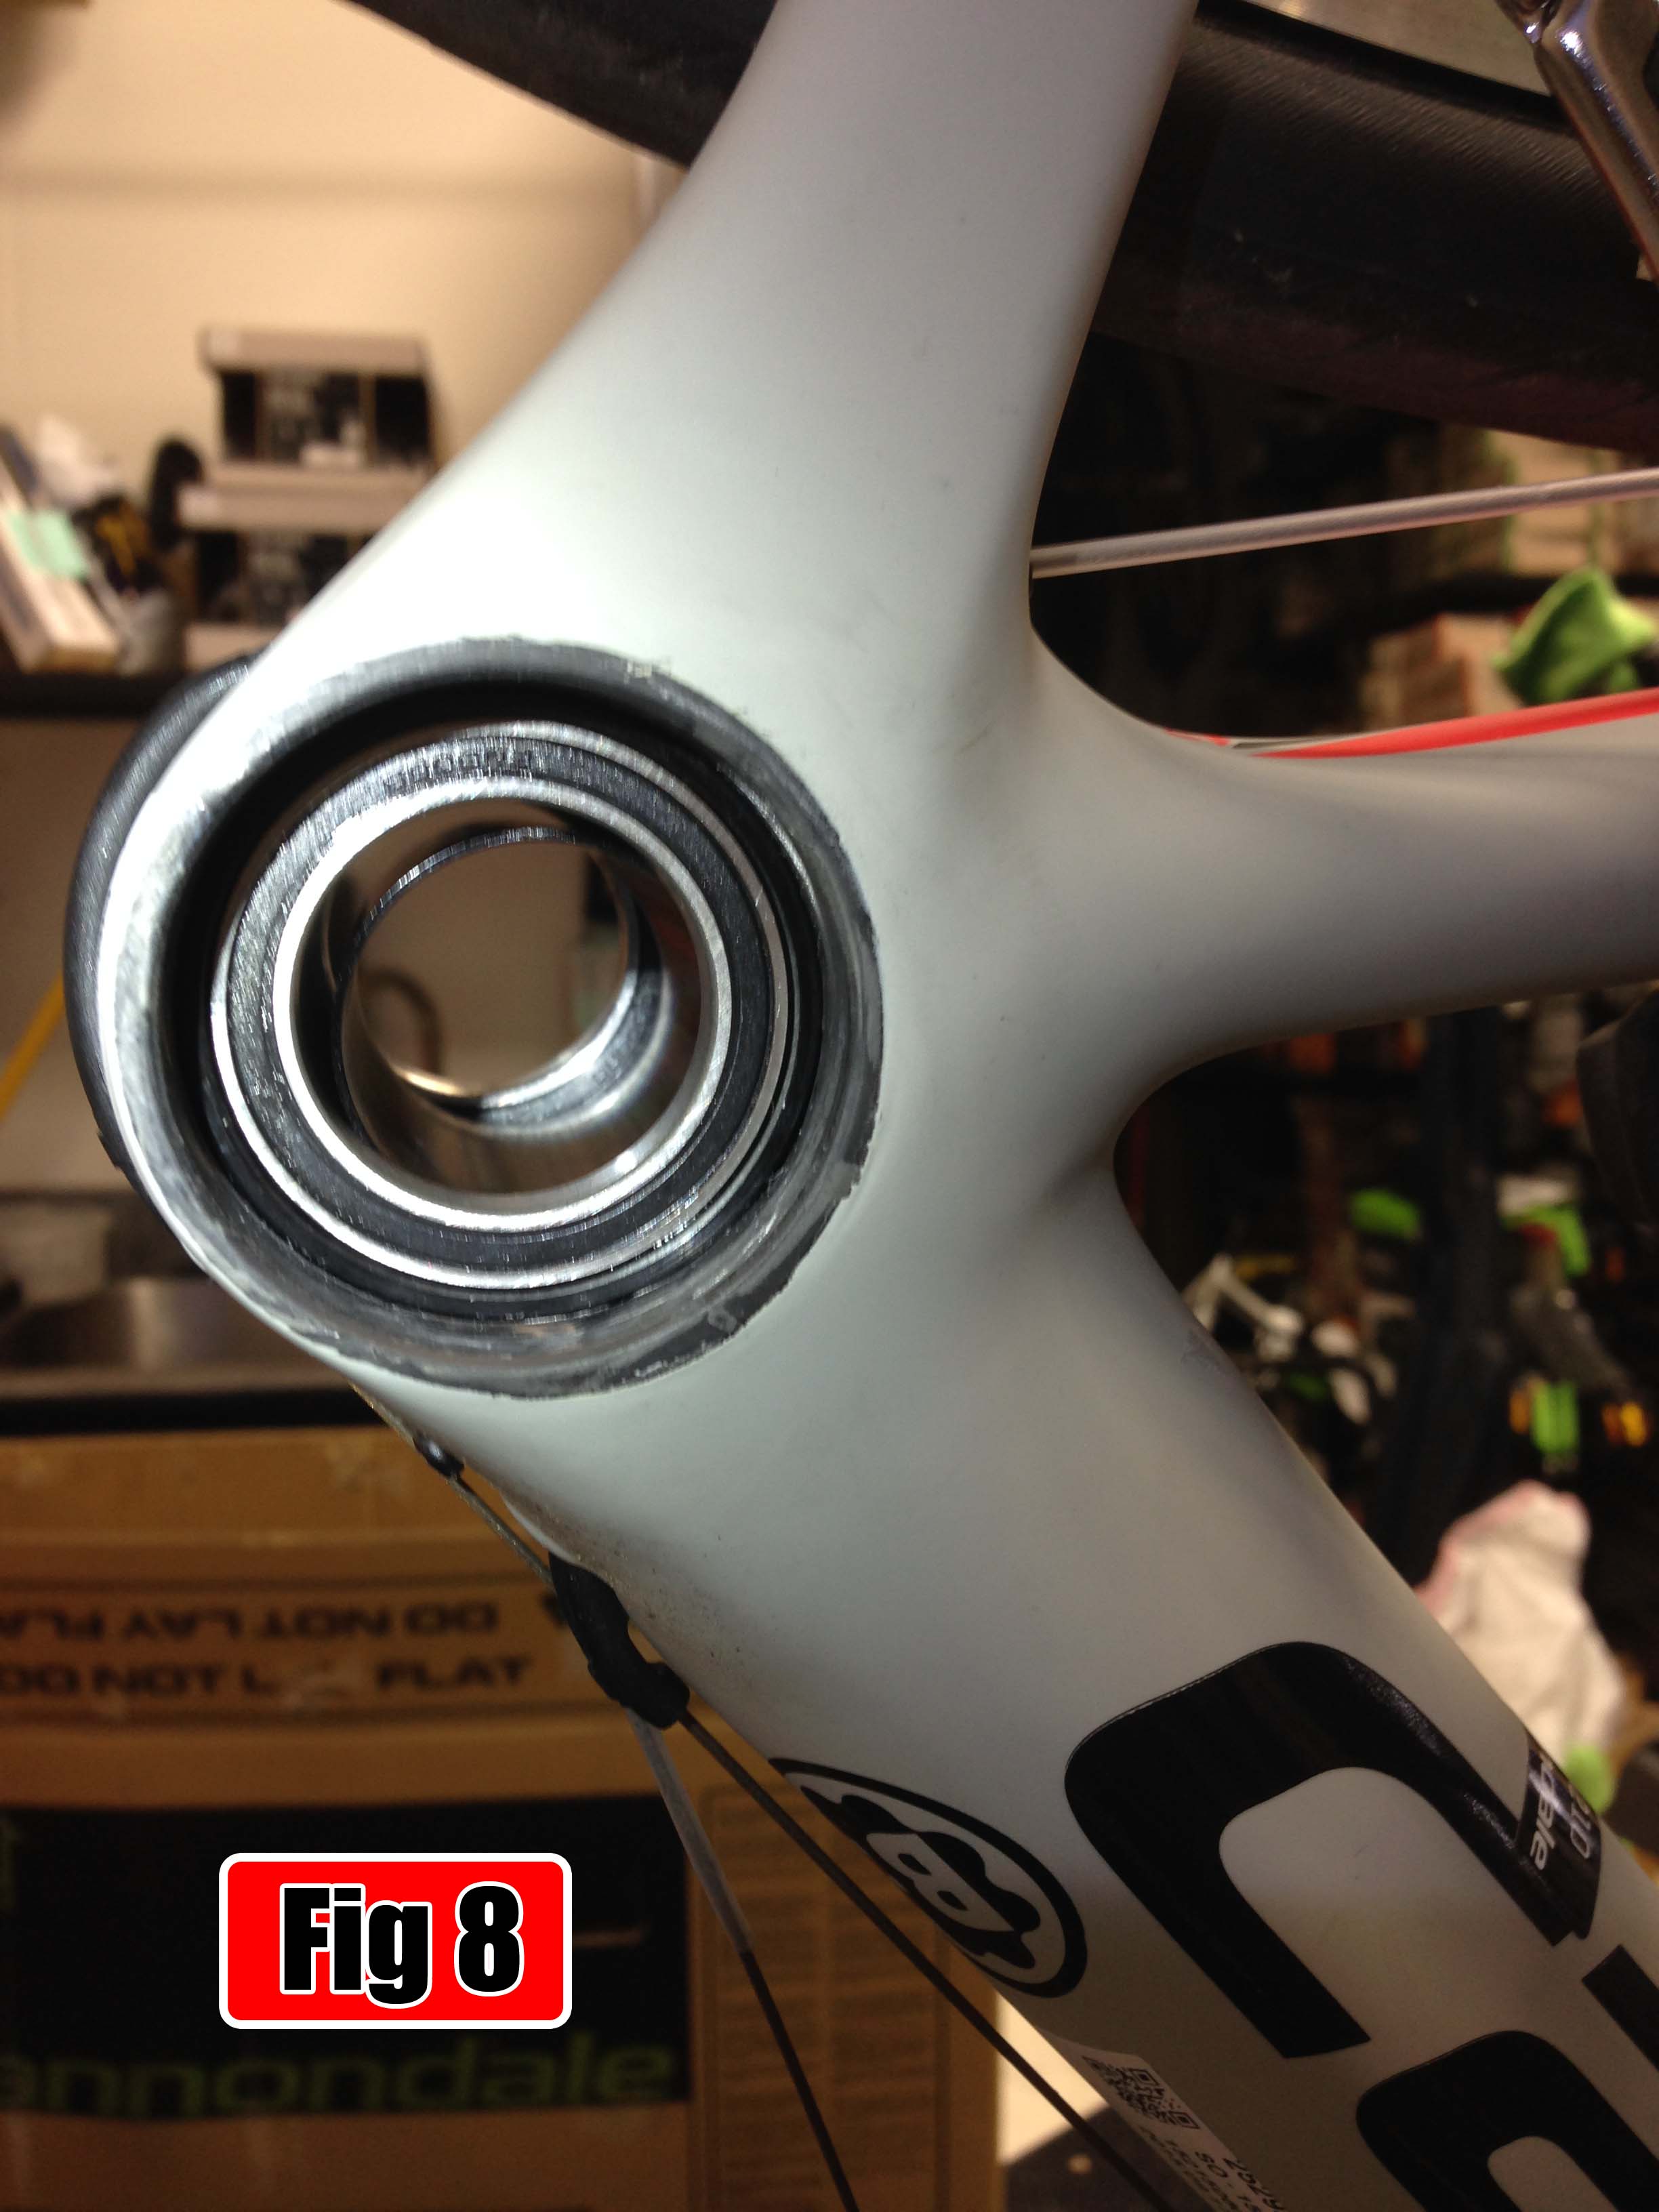
When the module touches the far side, hand-fit it into the second frame contact zone (Fig 8).
Give it a nice hard shove to seat it before reinserting the press and preparing to do the final drive. Make sure to follow the PF30A installation instructions. I mean it.
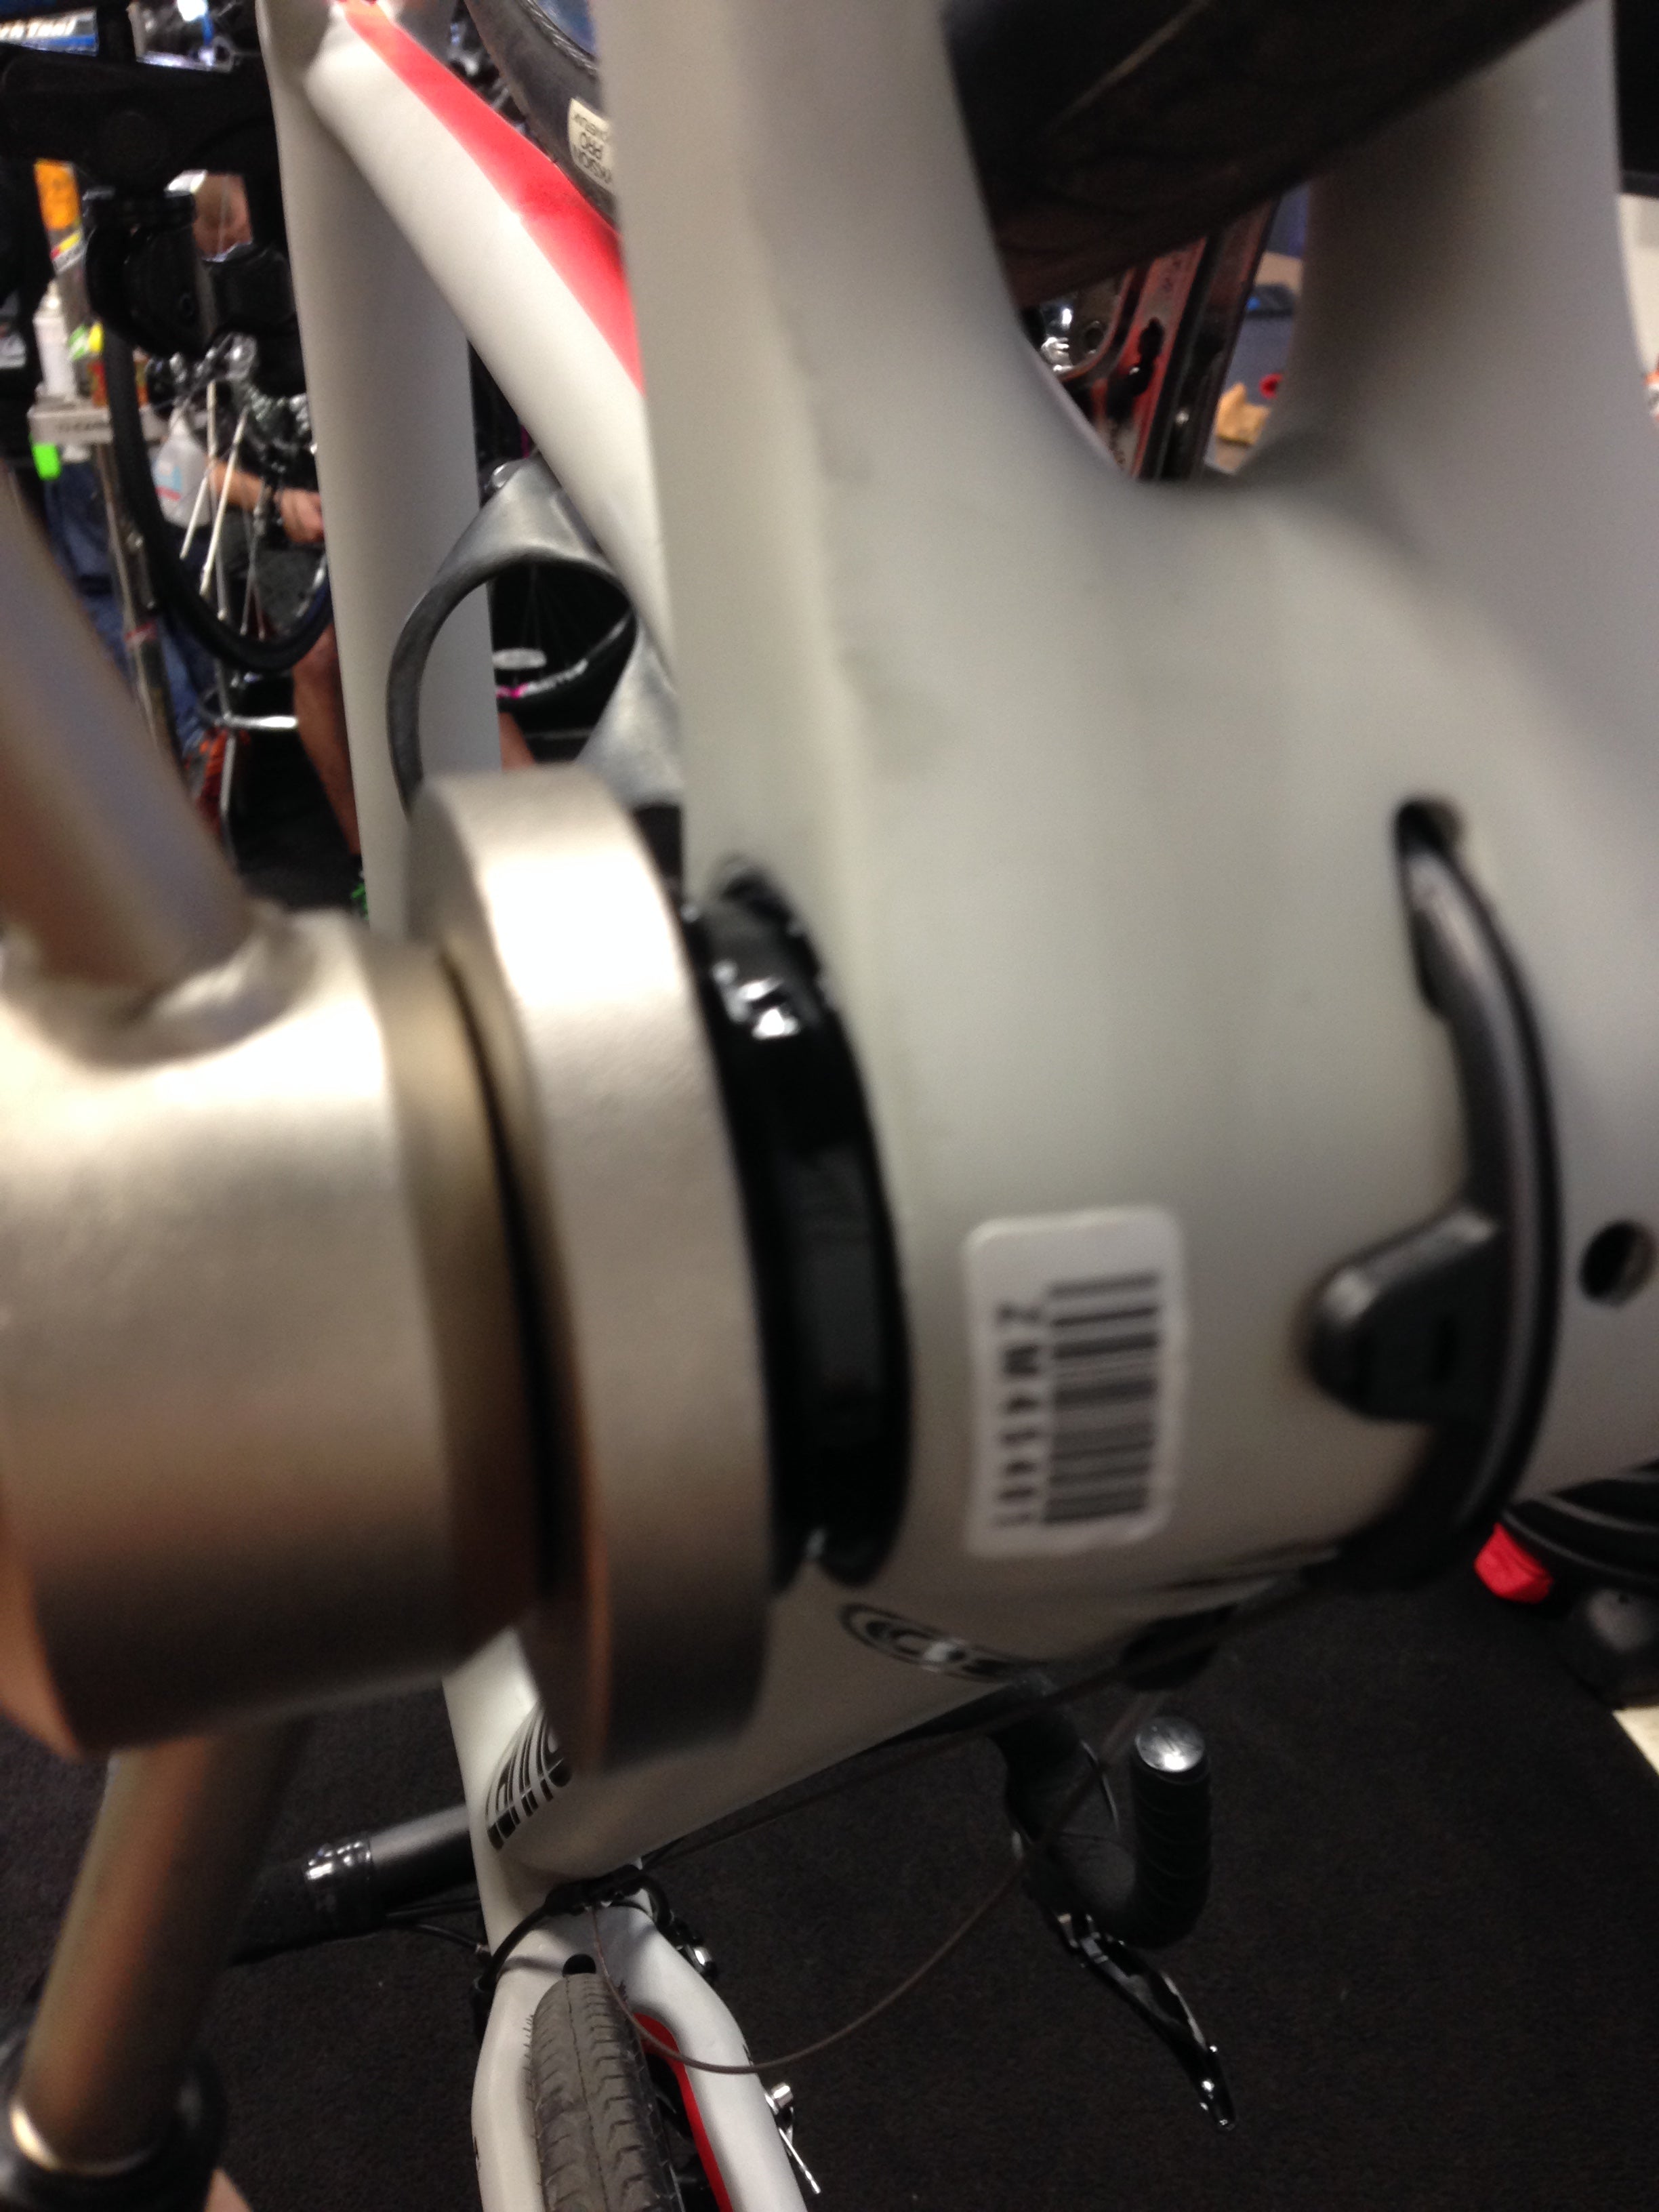
Now take a look at Fig 9. What you see here is exactly what you want.

The flange side is touching the frame and the non-drive side is absolutely flush with the frame. This is completely right. We did this intentionally because we found that this corrected an inherent chainline issue with the PF30 format, and it gives lots of room for power meters with a plump backside.
Note: Pay attention to the hardware that came with the crank. Read it. Do it.
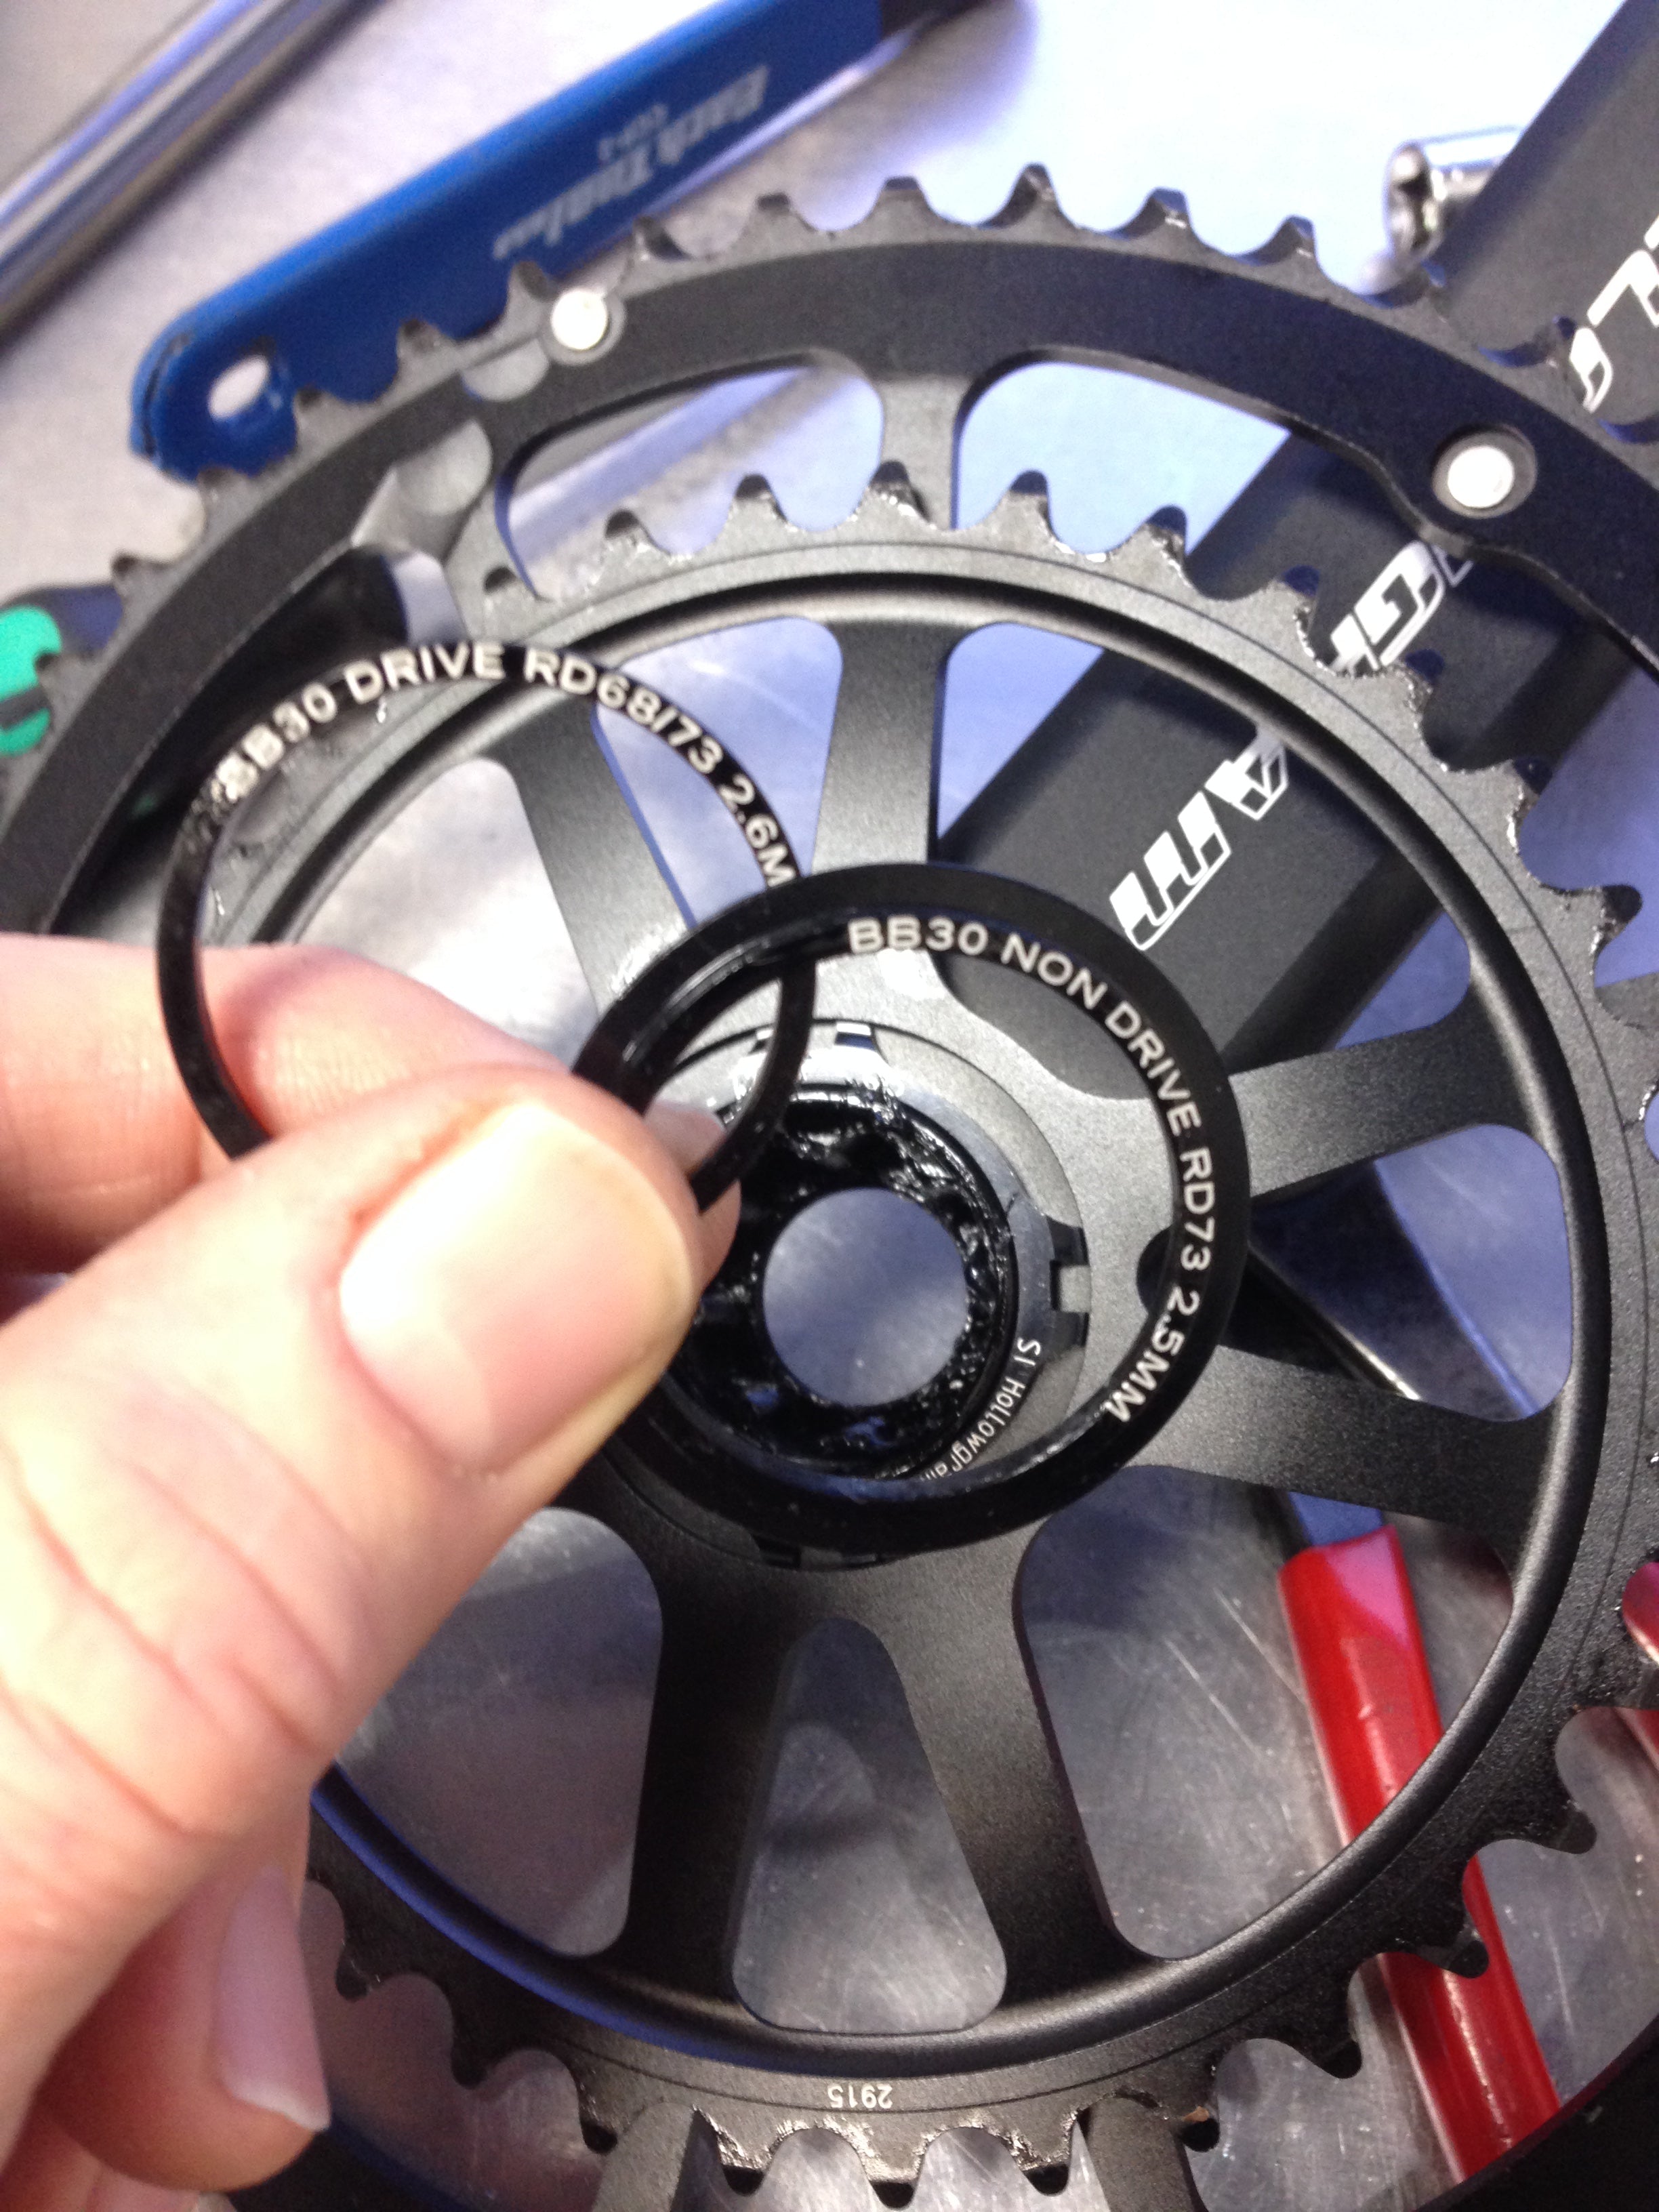
I threw in this pic of the final setup to show you how to make a Shimano 11spd gruppo play along nicely with Sram chain rings. It's easy: install Shimano rings.

Remember, when in doubt, use our bottom bracket tool set and read the bottom bracket installation instructions.
*except a BB30 crankset, which ONLY works in a 68mm wide or narrower bottom bracket shell due to the short spindle.
Comments will be approved before showing up.
Craig Warth
April 25, 2018
Thank you for the very detailed description of the vague Cannondale BB30a and it’s install. Everyone with
this type of BB will benefit from this.